Materials:
- Background Fabric
- Silhouette Fabric (I also used this for the piping and the backing of the pillow to create a frame, if you decide to do the same be sure to buy the quantity you will need.)
- Wonder Under (paper-backed fusible webbing)
- Handmade stencil
- Cording to create Piping (optional)
- Thread
- Scissors
- Pencil
- Sewing Machine
- Iron (& ironing surface)
STEP 1: Create Your Stencil
Find an image you like and print it onto cardstock. I have a thing for birds, so I ran a google image search for bird silhouettes and found one that tickled my fancy. Be sure to print it at a size that is appropriate for your finished pillow. Cut out the image, and ta-da, insta-stencil.
STEP 2: Create Fusible Fabric
Cut out a square that will fit your stencil from both the Silhouette Fabric and the Wonder Under. Place the wrong side of the fabric (aka the side you do not want to show) and iron it to the fusible side of the Wonder Under.
Your process might go a little something like this: 1) Place fabric down so that you are looking at the side you don't want to show. 2) Place fusible side of paper onto fabric (this should result in the paper side of the Wonder Under facing you as the top layer). 3) Place iron on paper side of Wonder Under, moving over the entire area to fuse materials together.
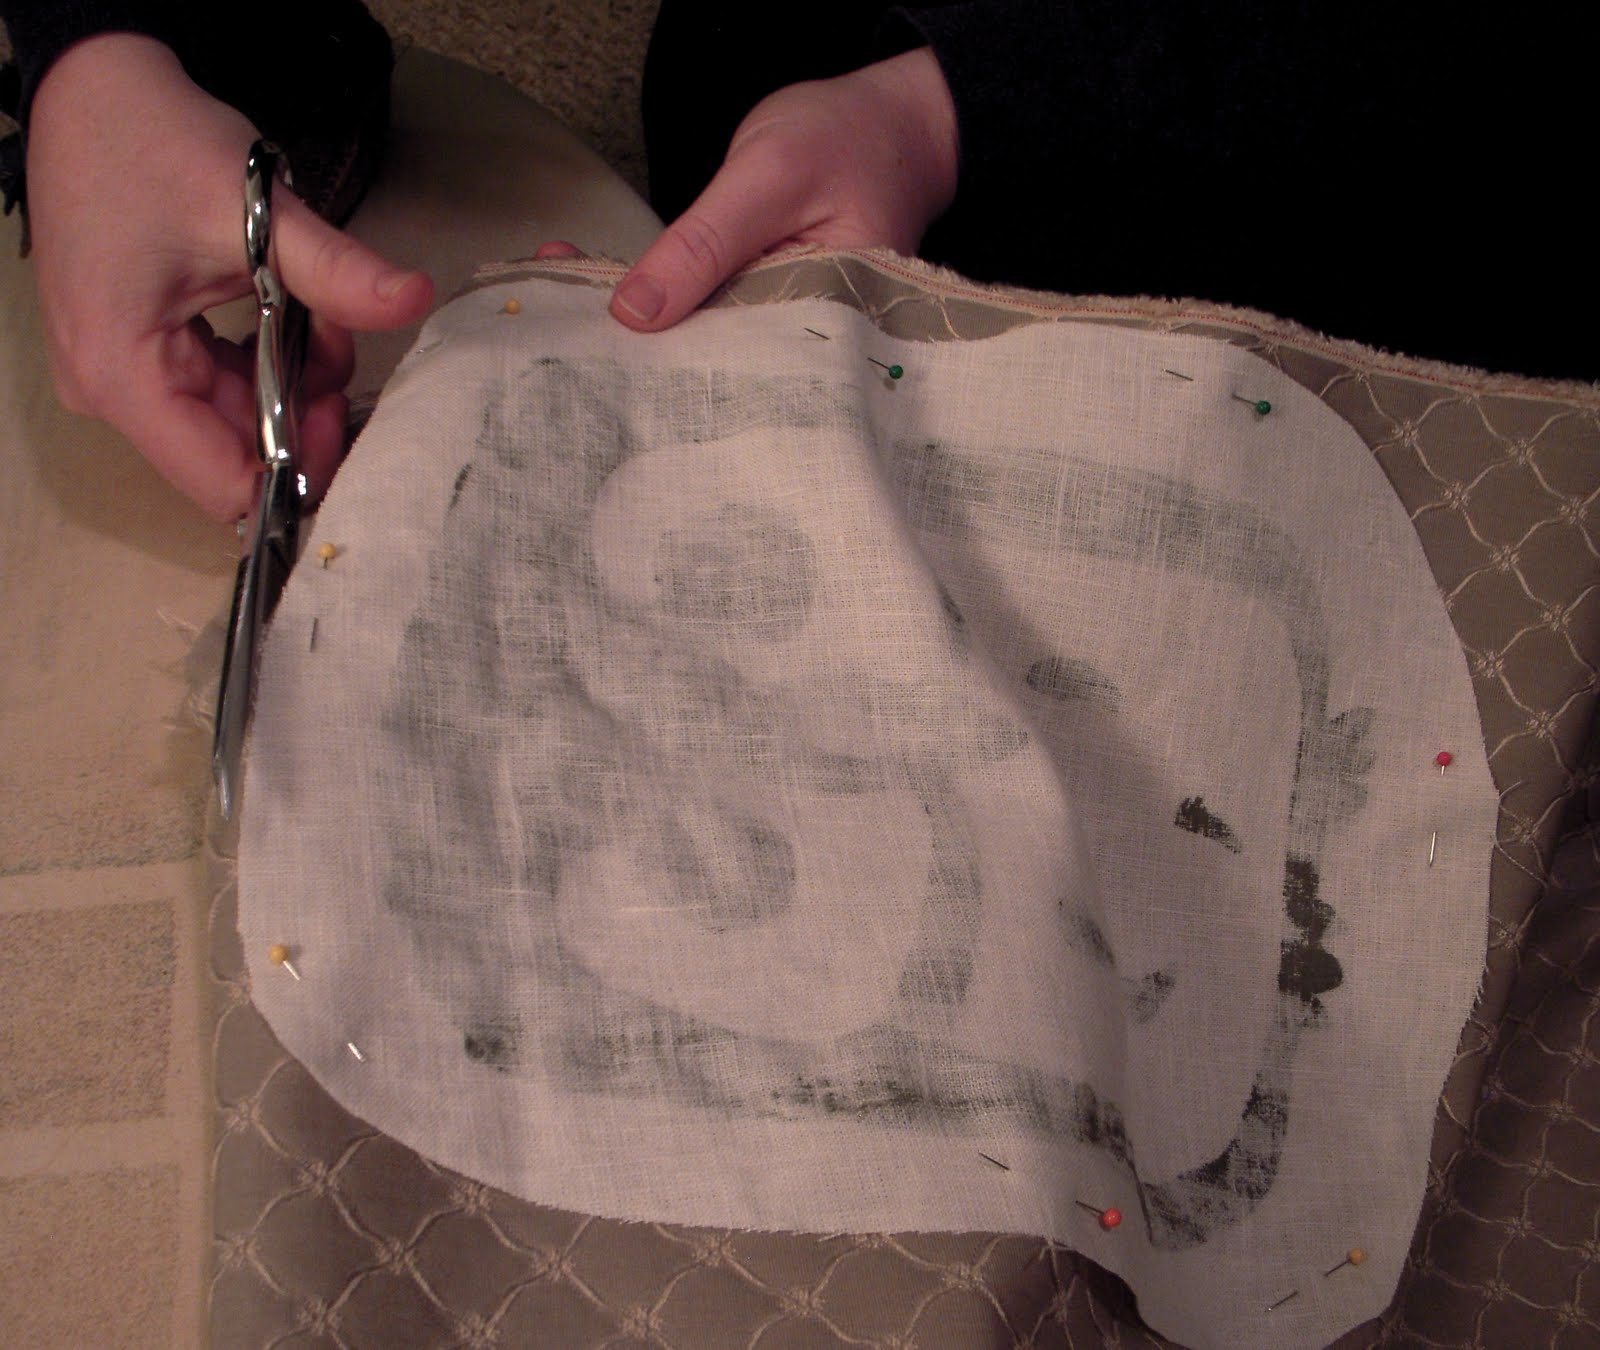
STEP 3: Trace Your Stencil & Cut it Out
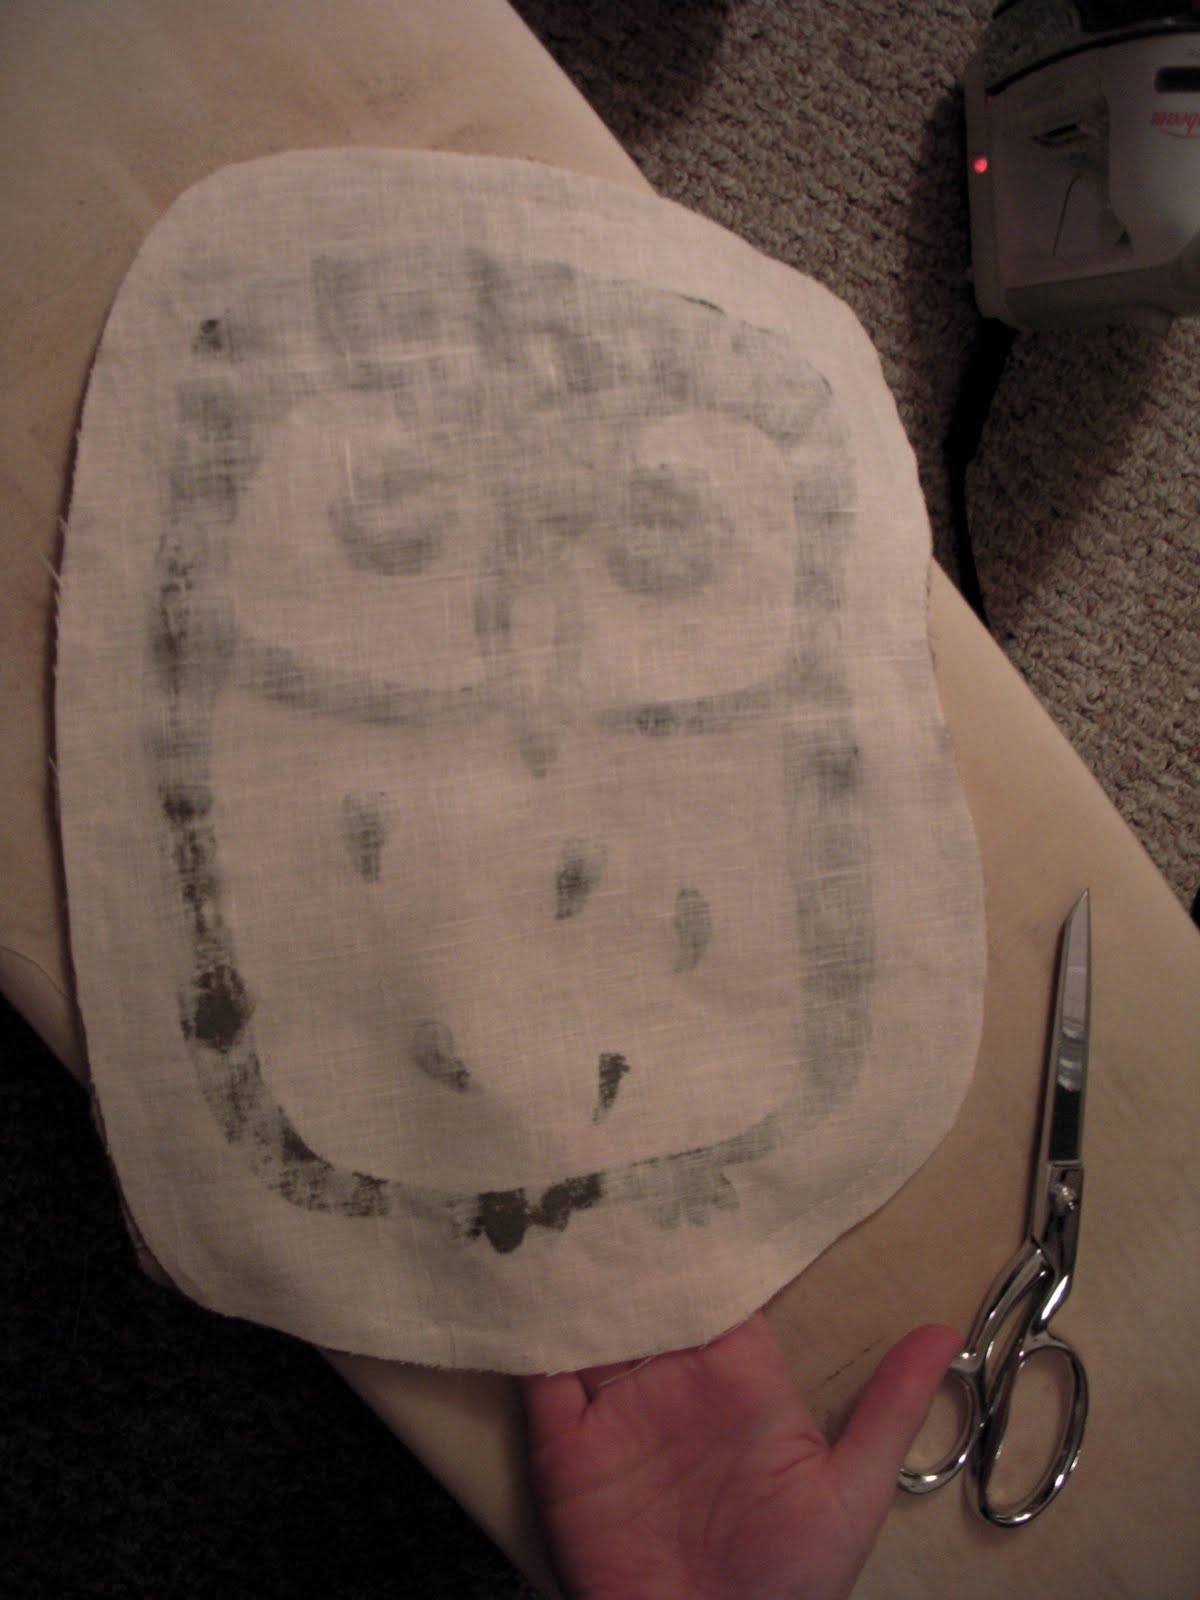
The beauty of Wonder Under is that you now have paper surface to trace your stencil onto. Place your stencil down, trace with a pencil, then cut out the image that you will iron onto your pillow. (The paper should remain on your fabric for this entire process.)

STEP 4: Iron On Your Image
Peel the paper from your silhouette. Place your image where you want it to end up on your finished pillow. Remember, when choosing a spot for your image, your background fabric will look a .025 - 0.5 inch smaller once you sew it together. Carefully move your pillow to your ironing surface and iron on your image with the right side facing up. The beauty of fusible webbing is that now your image is adhered to your background fabric. (NOTE: This would be a good time to do any embellishment like top-stitching or beading. I kept it simple this time, but I have a big ideas for the future.)


STEP 5: Create Piping (optional, you can skip to step 7 if you do not want piping on your pillow)
I used the white linen, which matched my bird, to create the piping and the backing of my pillow. This way it acted as a frame and highlighted the bird further. To create the piping you need to: 1) Measure the circumference of your pillow to figure out the length of the piping you will require. 2) Cut two-inch wide lengths of your piping fabric. 3) Sew the lengths of fabric together to create one long 2-inch wide piece of fabric. 4) Fold the linen in half around the cording and use a sewing machine to stitch the fabric together, staying as close to the cording as possible. In my case, this resulted in the foot of my sewing machine being raised and riding on top of the cording.
STEP 6: Pin and Snip Your Piping
Now, with the right side of the fabric face up, pin your piping around the edge of the pillow. The piping must face toward the center so that when you turn it right side out it will be on the outer edge. Start at the bottom center of your pillow. When you reach corner make three snips along the piping, careful not to cut the stitching, to allow the piping to traverse the corner. At the end, where the two pieces of piping meet, simply allow the piping to overlap (picture below in Step 7).

STEP 7: Baste the Piping to the Pillow
To assure that the piping remains where you want it as you sew your pillow together, it is important that you baste your piping to the front side of the pillow. Again, make sure that the right side of the fabric is facing up, that the piping is facing the inside of the pillow, that you have made small snips at the corners, and that the piping overlap is as inconspicuous as possible. Remember to remove your straight pins once you have basted your piping.

STEP 8: Sew the Front and the Back Together
To create a pillow that has an opening at the back you will want to cut out two panels of your packing fabric that overlap by about 2-3 inches. Run these two panels through your sewing machine to create a hem on the edges that will overlap (see photo below). Now, place the right sides of the fabric together. The back panels should be overlapping so that the outside edges match up with the size of the front of your pillow. Pin the fabric in place and sew. You can use the basting stitches as a guideline and sew directly over them.

STEP 9: Turn Right Side Out & Put in Pillow Insert
Once you have sewn your pillow together it is time to turn it right side out. You may want to use a straight pin to pull out the corners where the piping doesn't want to reveal itself. Then, gently push your pillow insert into the back of your pillow cover. And there you have it, a beautiful pillow to brighten up your home.

I am a bit of a self-taught sewer. Most of my projects start with an idea and then I stumble through the process of trying to figure out how to make that idea come to life. This is the first DIY I have written, so I hope that it is clear and helpful. If you have any questions leave them in the comments and I will do my best to get back to you. I would also love to see photos if anyone attempts to make their own pillow!
Have a great weekend, happy sewing!